

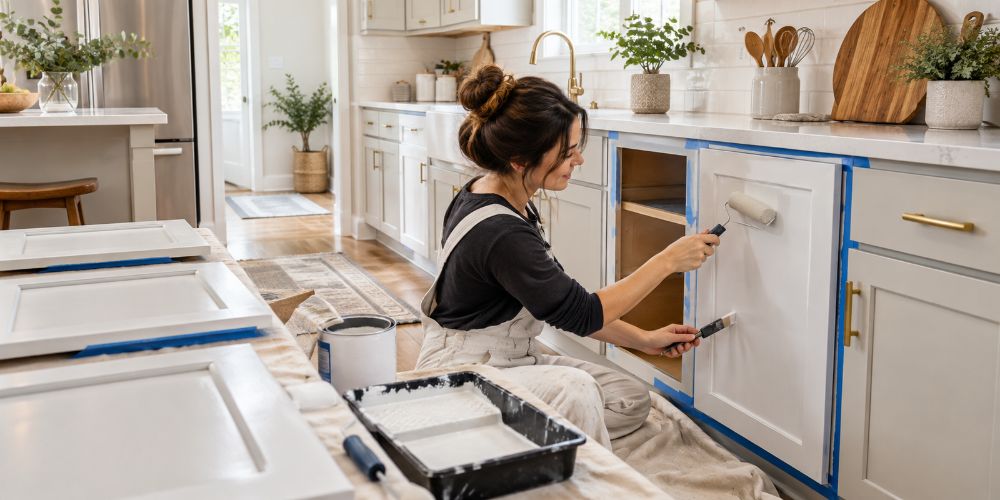
Laminate kitchen cabinets often look older than they really are. The doors may still close properly. The carcasses may be solid. Yet a shiny cream finish, faded wood effect or scratched surface can make the whole kitchen feel worn.
Painting is often worth considering at that stage. Horizon Bespoke Joinery works with fitted kitchens and custom cabinetry in Dublin, so the condition of the cabinets matters as much as the colour choice. For anyone looking into how to paint laminate kitchen cabinets, most problems come from poor preparation rather than the final coat.
Check Whether the Laminate Can Be Painted
Not every laminate door is a good candidate for paint. A firm, flat surface usually is. A door with bubbling foil, swollen MDF or loose edging is another matter.
The sink area often tells the story first. Water works into weak edges. Steam and heat can also affect wrapped doors near ovens or hobs. If the outer skin is already pulling away from the board, paint will not bond it back into place.
Some doors simply need a proper clean before a decision is made. Grease and old cleaner residue can make a sound surface look patchy. The guide on removing stains from kitchen cabinets can help distinguish ordinary buildup from actual finish damage.
Get the Basic Kit Together
A sensible kit keeps the job fairly straightforward.
A typical setup includes degreaser, fine abrasive paper, a bonding primer suitable for laminate, cabinet paint, a small smooth roller, a decent brush, masking tape and lint-free cloths. A screwdriver and a few labels are worth adding too.
Taking doors off usually makes the finish easier to control. Hardware can be removed without paint gathering around handles or hinges. Labelling each hinge with its door seems fussy until several nearly identical pieces are sitting on a worktop at the end.
Clean the Doors Properly
Kitchen grease is easy to underestimate because much of it is almost invisible.
Handles collect skin oils. Doors near the cooker pick up a fine film. Lower cupboards may have cleaning spray residue around the edges. Sanding over that layer does not clean it away. It can spread it across the surface.
A proper degrease comes first. Any cleaner that needs rinsing should be removed fully. The doors then need time to dry.
Take the Shine Off the Surface
Laminate only needs a light scuff before priming.
The aim is to knock back the shine. Fine abrasive paper is usually enough. Heavy sanding can cut through the decorative face, especially along corners where the laminate is thinner.
The surface should look evenly dull rather than scratched to pieces. Dust left behind can cause trouble too. Small particles around profiles or corners often show once paint dries.
Choose a Primer That Will Grip
Primer is one of the few places where taking a shortcut can ruin the job.
A standard wall primer is not automatically suitable for laminate. The label should mention laminate, melamine or hard non-porous surfaces. The primer needs to grip a surface that ordinary paint would rather slide over.
Thin coverage is easier to manage. Flat faces can be rolled while edges and grooves are better handled with a brush. The drying time on the tin should still be followed even when the surface feels dry.
Build the Colour Up Slowly
Cabinet paint is made for a harder life than wall emulsion. Doors are touched every day. They get wiped down. Rings, fingernails, pans and damp hands all leave their mark eventually.
Two light coats usually look cleaner than one heavy coat. Thick paint tends to collect along lower edges. It can also stay soft underneath while the top appears dry.
If the product allows sanding between coats, a light pass can remove dust nibs or small roller marks.
A worktop nearby should not be treated the same way. The advice on painting kitchen countertops explains the extra wear caused by heat, standing water and constant contact with kitchen items.
Give Fresh Paint Enough Time
Fresh cabinet paint can be deceptive. It may feel dry to a fingertip long before it has hardened enough for everyday use.
A handle tightened too soon can leave a ring in the finish. Two painted edges can stick together. A door can pick up a fingernail mark while being rehung.
Curing time changes with the paint, room temperature and humidity. The manufacturer’s instructions should decide when the hardware goes back on and when regular cleaning resumes.
Watch the Areas That Chip First
When laminate paint fails, the first chips often appear in predictable places. Handle areas take repeated contact. Lower corners get knocked. Sink doors deal with splashes and wiping.
Poor cleaning can be behind it. So can skipping the light sanding stage. A weak primer, thick coats or rushed drying time can produce a finish that looks good briefly then begins to lift.
Paint also leaves the internal layout exactly as it was. Where food, appliances or tall items still have nowhere sensible to go, Kitchen Pantry Cabinets may solve a practical problem that another colour cannot.
Conclusion
A sound laminate kitchen can take paint well, but the successful part of the job is mostly invisible. Cleaning, gentle abrasion, suitable primer and enough curing time matter more than rushing to see the new colour.
Where doors are already lifting, several units are damaged or the room itself no longer works well, Bespoke Kitchen Renovations may be more sensible than putting fresh paint over cabinets that need deeper attention.