
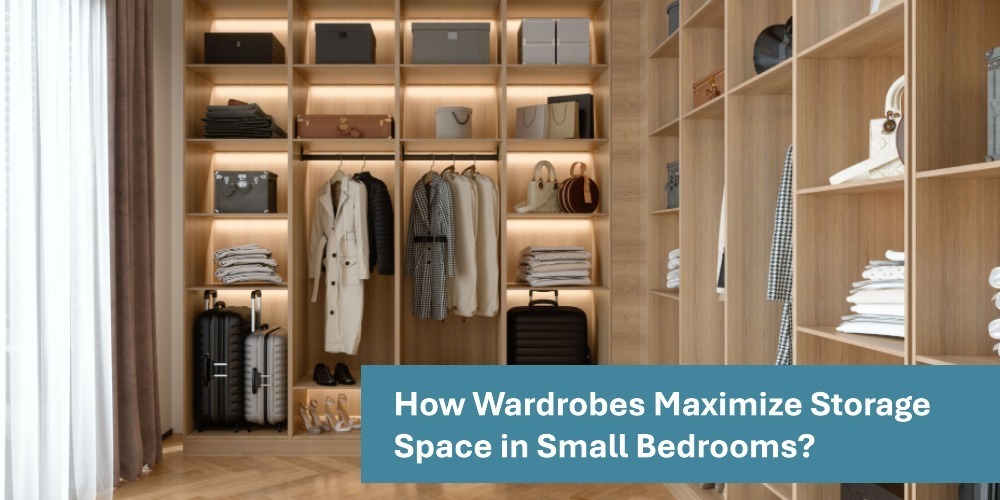
Wardrobes maximize storage in small bedrooms by using vertical space, choosing space-saving doors, and organizing the interior with the right mix of rails, shelves, drawers, and add-ons sized to what you own. If you want to get your wardrobe according to your style, then be sure to check out our custom built-in wardrobe solutions for maximizing storage solutions.
Steps To Maximize Space in a Small Bedroom
Step 1: Measure the room and set the correct depth
Start by confirming the footprint so you don’t waste a centimeter. Standard hanging depth is 60 cm (fits adult hangers). If you’re tight, a shallow unit of 45–50 cm works for folded items or angled hangers. Keep 60–90 cm clear in front for access if you use hinged doors.
Step 2: Go floor-to-ceiling to capture vertical volume
Full-height wardrobes (typical ceilings 2.4–2.7 m) add “top boxes” above the main section. Compared with a 2.1 m unit, taking the wardrobe to the ceiling commonly adds ~15–25% more cubic storage for luggage, bedding, and off-season items without enlarging the footprint.
Step 3: Pick door styles that don’t eat floor space
Sliding doors remove the door-swing zone (often 60–80 cm of clearance), which is a big win in tight rooms. Mirrored sliders double as a full-length mirror, so you don’t need a separate one, stealing wall space.
Step 4: Double up short-hang rails where possible
For shirts, blouses, and trousers folded on hangers, install two rails: one at ~100 cm and another at ~200 cm. This nearly doubles hanging capacity for short garments versus a single rail in the same width.
Step 5: Reserve a narrow long-hang bay only where needed
Dresses, coats, and abayas need 150–160 cm of clear drop. Keep this as a small, dedicated section so the rest of the wardrobe can use the more efficient double-hang setup.
Step 6: Use drawers for small/folded items and set the correct sizes
Deep drawers stop piles from toppling and use depth efficiently. A 600 mm-wide drawer of 45–50 cm depth typically fits 8–10 T-shirts or 4–5 pairs of jeans. Put drawers at waist height for easiest access; use shelves above and below.
Step 7: Set shelf spacing to the contents (and make them adjustable)
For knits and linens, shelf gaps of 25–30 cm prevent wasted headroom. Adjustable holes every 32 mm let you fine-tune later as your wardrobe changes.
Step 8: Add purpose-built pull-outs to compress tricky items
Trousers rack (pull-out): holds 10–15 pairs per 1 m width without stacking.
Shoe racks (angled): each level stores 3–4 pairs per 600 mm; five levels fit 15–20 pairs in a very small bay.
Accessory trays/hooks: keep belts, ties, scarves flat so they don’t claim shelf space.
Step 9: Exploit corners, alcoves, and over-bed bridges
Corner modules or L-shaped interiors recover space that’s often dead you can gain ~30–40% more usable volume versus leaving a gap. Shallow alcoves (40–45 cm) are perfect for shelves and drawers. Over-bed bridge cabinets (~35–45 cm deep) add ~0.5–1.0 m³ of extra storage across the bed wall.
Step 10: Choose hardware that improves access
Full-extension runners and soft-close hinges let drawers use their entire depth. Interior lighting (LED strips) stops items from getting lost on upper shelves, so you actually use the space you built.
Step 11: Standardize hangers and use slim ones
Switching to uniform, slim hangers typically frees ~20–30% bar space compared with bulky mixed hangers, letting you hang more without widening the wardrobe.
Step 12: Rotate seasonally and compress rarely used textiles
Store off-season clothes and bedding in top boxes with vacuum bags, which can cut soft-item volume by 50–75%. Label bins so you can retrieve items fast without emptying shelves.
If you follow these steps correctly, depth full height, sliding doors, double-hang rails, right shelf spacing, and targeted pull-outs, you’ll fit far more into the same footprint and still find everything quickly.
How to Organize Your Wardrobe?
To organize your wardrobe, you need to first empty it completely and then edit what you own. Then, rebuilding the space by category with the right mix of double-hang rails, drawers, and adjustable shelves sized to your items, keeping rods no more than 80–85% full so everything is visible and easy to reach.
Steps to Organize Your Wardrobe
Step 1: Empty and measure
Take everything out so you see the real space. Measure:
Hanging depth: 60 cm for adult hangers (45–50 cm is fine for folded/shelves).
Internal width in centimeters; you’ll use this to plan rails and shelves.
Step 2: Edit what you own (fast, objective rules)
Make four piles: Keep / Tailor / Donate / Recycle.
If you didn’t wear it in 12 months, move it out.
If it doesn’t fit or needs repair, tailor it within 2 weeks or donate.
This cut makes the next steps accurate.
Step 3: Plan sections by garment type
Design around how you actually dress:
Double-hang (short items): shirts, blouses, trousers-on-hangers. Two rails at ~100 cm and 200 cm almost double the capacity.
Long-hang (small bay): dresses/coats need 150–160 cm clear drop.
Shelves & drawers: knits, denim, underwear, accessories.
Step 4: Set capacities with simple math
Use 1.5–2.0 cm of rail per hanger. A 90 cm rail holds about 45–60 shirts on slim hangers.
For drawers 600 mm wide × 45–50 cm deep, expect:
8–10 T-shirts (file-folded)
4–5 jeans
Keep each rod at ≤85% full to prevent crowding and wrinkling.
Step 5: Install the hardware that saves space
Slim, uniform hangers free ~20–30% bar space vs mixed bulky ones.
Full-extension runners let drawers use their entire depth.
LED strips inside help you use the upper shelves properly.
Step 6: Set shelf spacing to the contents
Adjustable shelves with 25–30 cm vertical gaps prevent wasted “air.” Add new peg holes every 32 mm so you can tweak later.
Step 7: Use the right containers for small items
Top boxes for rarely used items.
Accessory trays for belts, ties, scarves.
Clear shoe boxes or angled racks (each 600 mm level fits 3–4 pairs).
Label everything so you find it fast.
Step 8: File-fold to see everything at once
File-fold T-shirts, gym wear, and knitwear in drawers. You’ll see every piece at a glance and reduce toppling. Aim to keep stacks ≤25 cm high on shelves.
Step 9: Put items where your hands naturally go
Place daily wear between the waist and the shoulder height.
Drawers for underwear/socks at waist level; heavy items (jeans) below; less-used items above.
Step 10: Use vertical “bonus” space
Take cabinetry to the ceiling. Top shelves hold luggage, spare bedding, or off-season bins. With vacuum
bags, soft items shrink by ~50–75%, multiplying top-shelf capacity.
Step 11: Organize by category, then color
Group by type (work shirts → casual shirts → knitwear), then sort light → dark. This makes scanning and pairing faster when you get dressed.
Step 12: Create a simple maintenance loop
Weekly (10 minutes): return strays, re-fold messy stacks.
Monthly: apply one-in, one-out to keep volume steady.
Seasonally (every 6 months): rotate off-season items to top boxes.
Example layout you can copy (180 cm internal width)
90 cm double-hang (45–60 short items).
30 cm long-hang (dresses/coats).
60 cm drawers/shelves (3–4 drawers + 3 adjustable shelves). This mix covers everyday outfits, keeps special pieces protected, and uses the footprint efficiently.