


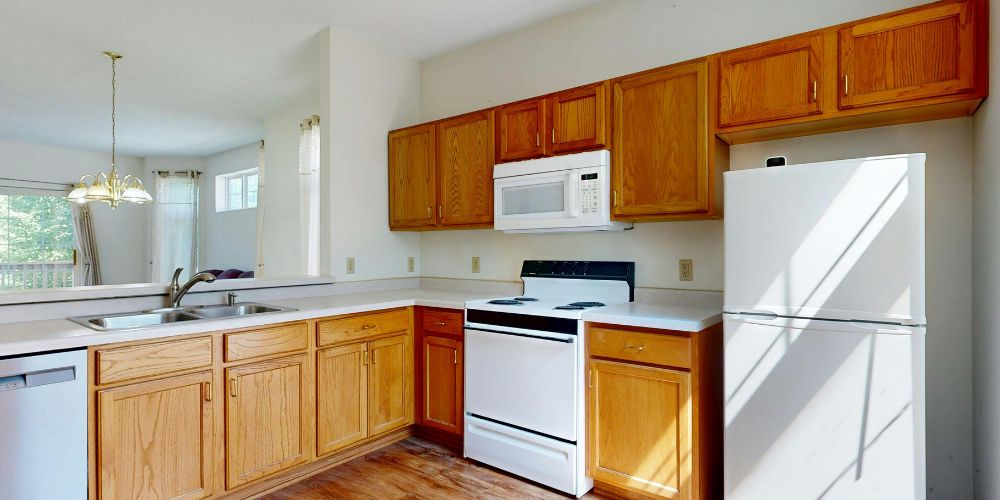
Kitchen cabinets are removed by first locating and removing the screws that secure the cabinet boxes to wall studs and neighbouring cabinets, then separating individual units from the installation structure. Wall cabinets are usually removed before base cabinets because they can weigh around 50–100 pounds (23–45 kg) without stored items. Base cabinets require additional steps, such as disconnecting plumbing, removing countertops, and cutting through caulk or adhesive lines before they can be detached from the wall and floor.
Step-by-Step Guide to Removing Kitchen Cabinets
1. Preparation and Safety
Before you pick up a drill, clear out all items from your cabinets and drawers. Switch off the water supply if your cabinets house a sink, and disconnect any gas or electricity for built-in appliances like ovens or cooktops. To protect your floors from scratches or falling debris, lay down a layer of heavy-duty cardboard or drop cloths.
2. Remove Doors, Drawers, and Molding
Start by removing all cabinet doors to make the frames lighter and the screws easier to access. Use a screwdriver to loosen the hinges from the cabinet frame. Pull out all drawers completely. If your cabinets have crown molding at the top or “toe kicks” at the bottom, gently pry them off using a crowbar.
Pro Tip: If you plan to reuse or sell the cabinets, label each door with painter’s tape so you know exactly where it belongs later.
Disconnect the Countertop
Countertops are usually secured to the base cabinets with screws or adhesive. Look inside the base cabinets and unscrew the fasteners pointing upward into the counter. If the counter is glued down, use a utility knife to score the caulk line along the wall (the backsplash) and then gently use a pry bar to lift the top off.
Remove Wall Cabinets First
Always remove the upper (wall) cabinets before the base cabinets. This prevents you from having to lean over bulky base units while lifting heavy upper ones.
Locate the Screws: These are usually found at the top and bottom horizontal rails inside the cabinet.
Support the Weight: Have a partner hold the cabinet or use a “T-brace” (a homemade wooden support) to keep the cabinet from falling once the screws are out.
Unscrew and Lift: Remove the screws connecting the cabinets to each other (the face frames) first, then remove the screws holding them to the wall studs.
5. Remove Base Cabinets
Base cabinets are typically screwed into the wall studs and sometimes to each other through the side panels.
Remove Wall Screws: Locate the screws along the back rail of the cabinet and back them out.
Separate Units: If the cabinets are joined together, remove those connecting screws.
Slide Out: Gently pull the cabinets away from the wall. Since base cabinets are floor-supported, they are generally easier to handle alone than wall cabinets, but watch out for any remaining shims (small wooden wedges) underneath that might snag on the floor.
Technical Specifications for Removal
Standard Screw Type: Most modern cabinets are held by #8 or #10 2.5-inch to 3-inch wood screws.
Weight Factor: An average 30-inch wall cabinet can weigh between 25 to 50 pounds empty; never attempt to unscrew the final wall support alone.
Tool List: You will primarily need a cordless drill, a Philips head bit, a flat pry bar, and a utility knife.
If you are planning a full bespoke kitchen renovation, proper removal is the first step toward a high-quality finish. Following these steps ensures your space is prepped and ready for professional joinery and custom installation.
How Difficult is To Remove Kitchen Cabinets?
Removing kitchen cabinets is a moderate DIY task that usually takes around 4–8 hours for a small kitchen and 1–3 days for a larger kitchen with multiple cabinets, countertops, or utility connections. The difficulty depends on how the cabinets are installed, with wall-mounted cabinets often weighing 50–100 pounds (23–45 kg) before adding stored items. Cabinets connected to plumbing, electrical systems, or heavy stone countertops require additional care and may need professional assistance.
How Do I Remove Kitchen Cabinets Without Damaging Them?
Yes, you can remove kitchen cabinets without damaging them by following a careful process that includes labeling parts, removing accessories, detaching the countertop, and unscrewing the wall and base units from the studs.
Step-by-Step Guide to Damage-Free Cabinet Removal
1. Label and Prepare
Before you begin, label every door and drawer with painter’s tape so you can easily reassemble them later. Clear out all contents and clear the workspace. Use a utility knife to score the caulk or paint along the edges where the cabinet meets the wall. This prevents the drywall paper from tearing away when you pull the cabinet out.
2. Remove Hardware and Doors
Remove all doors by unscrewing the hinges from the cabinet frame. Take out the drawers and remove any adjustable interior shelves. If you have crown molding or toe kicks, use a thin pry bar and a small block of wood for leverage; place the wood block against the wall or cabinet to act as a fulcrum, which prevents the pry bar from denting the wood surfaces.
3. Detach the Countertop
Most cabinets are damaged during countertop removal. Locate the screws inside the base cabinets that point upward into the counter and remove them. If the counter is glued with silicone, use a heat gun to soften the adhesive or a long, thin putty knife to carefully slice through the bond between the cabinet and the counter. Lift the countertop straight up rather than sliding it.
4. Separate Linked Cabinets
Cabinets are often joined together through their side “face frames.” Locate the screws connecting these frames (usually near the hinges) and back them out. Do not attempt to pull a cabinet off the wall while it is still attached to its neighbor, as this will cause the wood to split or crack.
5. Remove Wall Units with Support
Always start with the upper units. Since you want to avoid damage, you must support the weight of the cabinet before loosening the wall screws.
- The Support Method: Place a “T-brace” or a stack of sturdy boxes on the floor to hold the cabinet’s weight.
- Unscrew: Once supported, remove the screws from the back rail that go into the wall studs.
- Safe Landing: Slowly lower the cabinet onto a padded surface.
6. Pull Base Cabinets
Base cabinets are the easiest to remove without damage because they sit on the floor. After removing the screws from the wall studs, check for any shims (small wooden wedges) tucked underneath or behind the unit. Carefully pull the cabinet straight forward. If it feels stuck, check for hidden screws behind the plumbing or inside the back corners.
Key Data and Precautions
Screw Identification: Use a Philips head or Square (Robertson) bit, as these are less likely to slip and strip the screw head compared to a flat head.
Force Level: Never use a hammer or large crowbar directly on the cabinet wood; if a cabinet isn’t moving, there is likely a hidden screw you missed.
Weight Support: Wall cabinets weigh between 25 and 50 pounds; having a second person is essential to prevent the unit from dropping and splintering.
How to Remove Kitchen Cabinets Without Removing Countertop?
To remove lower kitchen cabinets without removing the countertop, you must first support the countertop using heavy-duty adjustable props or temporary supports, then remove the cabinet fixings and carefully cut any silicone, adhesive, or sealant holding the countertop to the cabinet frames.
1. Empty and Prepare The Cabinets
- Remove all items from the cabinets and drawers.
- Remove drawers and cabinet doors to reduce weight.
- Place protective sheets or plywood on the floor to prevent damage.
2. Disconnect Plumbing And Appliances (if applicable)
- Turn off the water supply.
- Disconnect the sink plumbing if the sink is sitting in the countertop.
- Remove appliances attached to the cabinets (dishwasher, oven panels, etc.)
- Disconnect electrical connections safely.
3. Support the Countertop Before Removing Cabinets
Since the countertop will lose its support:
- Place temporary supports underneath the countertop using adjustable support poles, timber posts, or a temporary frame.
- Position supports close to where cabinets are being removed.
- Make sure the countertop is level and stable before removing any cabinet.
4. Remove Screws Connecting Cabinets Together
Open the cabinet doors and look inside the cabinet frames.
- Remove screws joining adjacent cabinets.
- Check for screws fixing cabinets to the wall.
- Use a drill/driver to remove all fasteners.
5. Separate Cabinets From The Wall
- Carefully cut through any silicone, caulk, or adhesive between the cabinet and wall.
- Use a utility knife or oscillating tool.
- Slowly pull the cabinet away from the wall.
6. Remove the Cabinet Boxes
- Start with the easiest cabinet first.
- Remove base cabinets one at a time.
- If cabinets are screwed together, separate them before pulling them out.
- Avoid twisting or lifting the countertop while removing the units.
7. Keep The Countertop Supported
After cabinet removal:
- Leave temporary supports in place.
- Do not place heavy items on the unsupported countertop.
- If the countertop is stone (granite, quartz, marble), extra support is essential because it can crack under its own weight.
Important Considerations:
Laminate countertops: Usually easier to support temporarily.
Granite/quartz countertops: Much riskier because they are heavy and brittle; professional removal is often recommended if the countertop must stay.
If the cabinets are glued to the countertop: Removing them without lifting the countertop may not be possible without damage.
Island cabinets: Usually require a stronger temporary support frame because they are not wall-supported.
